
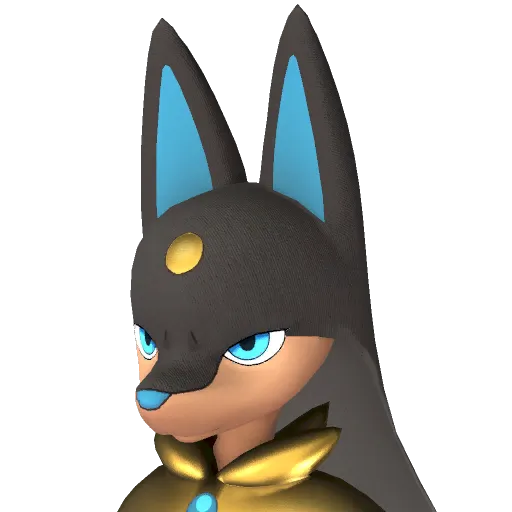
Palworld 1.0 didn't just add 70 new Pals. It silently rewrote nearly the entire breeding matrix. Combos you memorized in Early Access — Penking + Bushi for Anubis, Kitsun + Astegon for Shadowbeak — are gone. Pocketpair didn't announce this in the patch notes. Players discovered it the hard way, burning cakes on eggs that hatched into completely wrong species.
The good news: the new breeding table is learnable, and some of the new routes are actually better for early-game progression than the old ones. This guide covers the ten Pals worth your first cakes, in the order you should breed them.
Before Anything Else: Your Cake Factory

You can't breed without Cake. You need one per egg. The bottleneck for most players isn't finding the right parents — it's running out of honey and milk.
| Resource | Source | How to get it |
|---|---|---|
| Honey | Beegarde at Ranch | Breed from Daedream + Mozzarina (both available by level 15) |
| Milk | Mozzarina at Ranch | Common spawn near Plateaus of Beginnings |
| Eggs | Chikipi at Ranch | Literally the first thing you catch |
| Flour | Mill from Wheat | Wheat Plantation (level 15) → Mill |
| Red Berries | Berry Plantation | Level 5 unlock, zero effort |
Build one Ranch. Put a Chikipi, a Mozzarina, and a Beegarde in it. They'll produce eggs, milk, and honey passively while you do everything else.
1. Beegarde — Your First Breed, Period
Why first: No honey = no cake = no breeding. This is the lock. You cannot skip it.
Breeding combos: Daedream + Mozzarina (easiest — both available by level 15), Tanzee + Melpaca, Puffolt + Chillet.
Why breed instead of catch: Wild Beegarde spawn in the desert around level 22. At that point in the game you don't have heat-resistant armor and you'll die to a Tocotoco sneeze. Breeding is safer and lets you target useful passives from the start.
2. Yakumo — The Passive Skill Magnet
Why second: Yakumo's Partner Skill gives wild Pals you encounter a chance to inherit Yakumo's own passives. Breed one Yakumo with a great passive, take it hunting, and the wild Pals you catch will sometimes already have that trait. This fundamentally changes how you source passives for the rest of the game.
Breeding combos: Lamball + Leafan (easiest — both in starting area), Vixy + Leafan, Croajiro + Croajiro Noct.
Strategy: Breed a Yakumo carrying exactly one great passive — Artisan, Swift, or Musclehead. A single-passive Yakumo is more effective than one carrying four. With one passive, the wild Pal inherits that specific trait or doesn't. With four, you're rolling against three junk traits on every capture.
3. Anubis — But Not the Way You Remember
Why third: Anubis is still the best early Handiwork Pal (Handiwork 4, Mining 3, Transporting 2). Every base wants 3-4 of these.
The old combo is dead. Penking + Bushi now produces Sibelyx, not Anubis. Do not waste your cake.
New 1.0 combos that work: Vanwyrm + Cinnamoth (recommended — both accessible by level 25), Relaxaurus + Celaray, Incineram + Surfent, Nitewing + Rayhound, Mossanda + Katress, Broncherry + Mammorest.
Passives to target: Artisan + Work Slave + Serious for pure base workers. Add Nocturnal if you're on a multiplayer server where night-skipping isn't reliable.
4. Fenglope — Your First Real Mount
Why fourth: One of the fastest ground mounts in the game, has a double jump, and can be bred from parents you already caught while setting up the cake pipeline. See Fenglope's full breeding guide for all parent combos.
Breeding combos: Penking + Lifmunk, Sparkit + Surfent, Croajiro + Loupmoon Cryst.
5. Chillet Ignis — Kindling Without the Desert Trip
Why fifth: Fire-type worker, Kindling 3, rideable. Normally requires going to Sakurajima Island — breeding skips the trip entirely.
Breeding combos: Chillet + Arsox (easiest), Rooby + Bushi Noct.
6. Azurobe — Water Your Entire Base With One Pal
Why sixth: Watering 4. Solves all plantation, mill, and crusher water needs with a single Pal.
Breeding combos: Grizzbolt + Flambelle (recommended), Rooby + Bushi Noct, Gumoss + Whalaska.
7. Univolt Cryst — Cooling Coverage
Why seventh: Cooling 6. Refrigerators, coolers, and incubator temperature management all suck without a dedicated Cooling Pal.
Breeding combos: Warsect Terra + Relaxaurus, Cryolinx + Univolt.
8. Jormuntide — Watering Endgame
Why eighth: Watering 7. Finishes massive plantations almost instantly. This is the Watering Pal you'll keep for the rest of the game. See Jormuntide's detailed stats & combos.
Breeding combos: Warsect Terra + Relaxaurus (reuses the same parents from your Univolt Cryst chain), Mossanda + Helzephyr.
9. Jormuntide Ignis — The Best Cook in the Game

Why ninth: Kindling 7. Cakes cook instantly. Ingots smelt while you blink.
Breeding combos: Jormuntide + Blazehowl. Once you have Jormuntide Ignis, replace every Kindling Pal in your base with it.
10. Orserk — Power Grid Solved
Why tenth: Electricity 8. Highest generating capacity of any breedable Pal. One Orserk runs your entire assembly line.
Breeding combos: Grizzbolt + Relaxaurus, Grizzbolt + Orserk (self-breed for better passives).
The Full Breeding Order, Summarized
- Beegarde → Cake pipeline (unlocks everything below)
- Yakumo → Passive skill magnet (makes all future breeding easier)
- Anubis → Base workhorse (builds everything faster)
- Fenglope → Speed + exploration
- Chillet Ignis → Early Kindling upgrade
- Azurobe → Watering solved
- Univolt Cryst → Cooling + Transporting
- Jormuntide → Endgame Watering
- Jormuntide Ignis → Endgame Kindling
- Orserk → Endgame Electricity
This order isn't arbitrary. Each Pal either unlocks the next step (Beegarde → everything, Jormuntide → Jormuntide Ignis) or provides an immediate efficiency gain that makes the next breeds faster (Yakumo → better passives for all future catches, Anubis → faster crafting of spheres for catching parents).
A Note on Breeding Charts You Find Online
If a guide doesn't explicitly say it was updated for 1.0, assume it's wrong. The number isn't exaggerated: a data analysis comparing pre-1.0 and post-1.0 breeding tables found that 97.7% of recipes changed.
Specific things that broke in 1.0:
- Penking + Bushi → Sibelyx (was Anubis)
- Kitsun + Astegon → no longer produces Shadowbeak
- Vanwyrm + Anubis → no longer produces Faleris
- Tower boss Pals (Grizzbolt, Orserk, Lyleen, Shadowbeak, Faleris) now require two of the same species to breed
💣 Continue reading
Looking for wilder builds? Read our Infinite Bomb Breeding Guide — breed Heavily Armored + Megaton Implode Tocotoco and Gorirat for one-shot boss kills.
Last updated: July 2026. Breeding data cross-referenced across game files, community data projects, and multiple independent breeding calculators verified against the 1.0 release.
Written by PalForge — the Palworld breeding calculator that reads your level.sav and builds a breeding roadmap from your actual Palbox inventory.